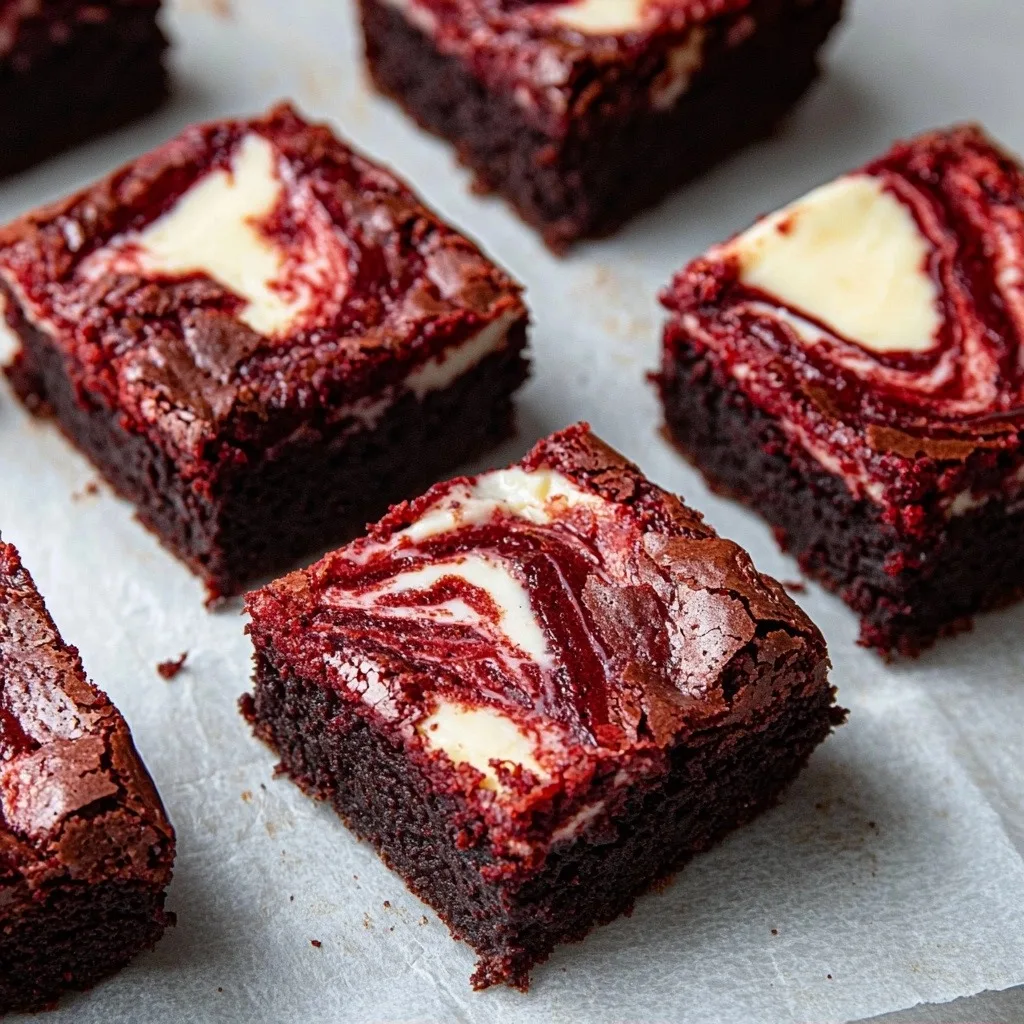
Oh, these Red Velvet Brownies! Every time I make them, I’m transported back to my grandmother’s kitchen. She always had a knack for making the simplest treats feel so special, and red velvet was her absolute favorite. There’s just something about that rich, decadent chocolate with a hint of tang and that gorgeous crimson color that makes my heart happy. This Red Velvet Brownie Recipe truly captures that magic, and I can’t wait for you to try it.
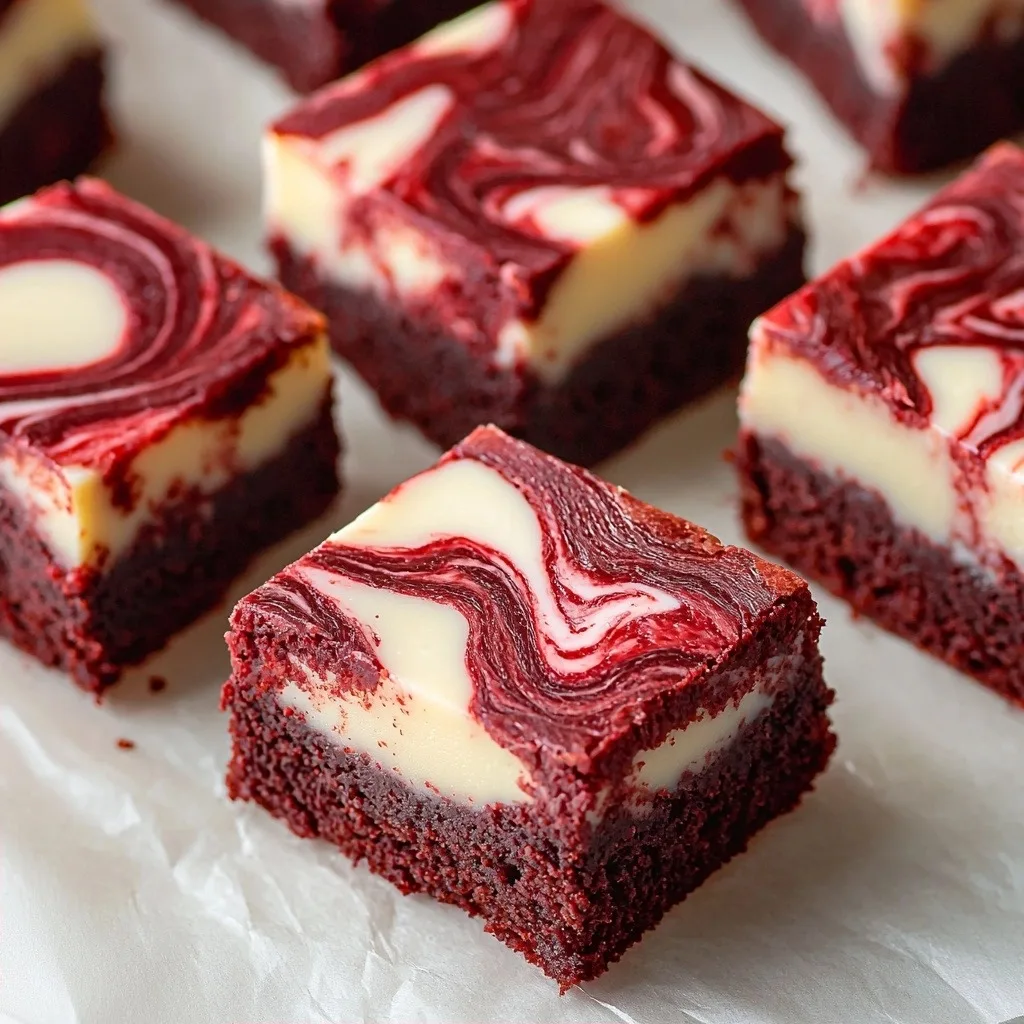
Why You’ll Love This Red Velvet Brownie Recipe
- These brownies are incredibly fudgy and rich – pure chocolate bliss in every bite!
- The cheesecake swirl adds a beautiful tangy contrast that cuts through the richness perfectly.
- They’re surprisingly easy to make, even if you’re new to baking.
- Perfect for holidays, special occasions, or just when you need a little something extra-special.
Ingredients You’ll Need
- Unsalted Butter: Using unsalted butter gives you control over the saltiness. If you only have salted, you can use it, but omit any extra salt you might add to other recipes.
- Caster Sugar: This fine sugar dissolves easily, giving your brownies a smooth texture without graininess. Granulated sugar works too!
- Red Food Colouring: This is what gives red velvet its iconic deep red hue. I usually use a gel food coloring for a more vibrant color with less liquid.
- Plain Flour: All-purpose flour is perfect here; it provides structure without making the brownies tough.
- White Wine Vinegar: Don’t skip this! It reacts with the cocoa powder and baking soda (if present, though not in this recipe) to enhance the red color and adds that classic subtle tang to red velvet.
- Full-Fat Soft Cream Cheese: Full-fat is key for a rich, creamy cheesecake swirl. Make sure it’s softened to room temperature for easy mixing.
- Egg Yolk: This adds richness and helps set the cheesecake swirl without making it too eggy.
How to Make Red Velvet Brownie Recipe Step by Step
First things first, let’s get your oven ready! You’ll want to preheat it to 180ºC (or 160ºC fan if your oven has that setting). While it’s warming up, line a 9×9 inch square tin with parchment paper. This makes it so much easier to get your beautiful brownies out later!
Now for the brownie batter. In a big bowl, you’ll beat together the softened unsalted butter and caster sugar until they’re nicely combined. Then, add in the vanilla extract and that vibrant red food coloring – mix it again until everything is beautifully red. Next, crack in your four medium eggs and mix them in well. This is where the magic starts to happen!
Finally, add your cocoa powder and plain flour to the wet ingredients and mix it gently until just combined. Don’t overmix! The last ingredient for the brownie batter is the white wine vinegar; stir that in quickly. For the cheesecake swirl, in a separate bowl, just loosen up the full-fat soft cream cheese, then mix in the sugar and vanilla, and finally, the egg yolk. Pour about 90% of your red brownie batter into the prepared tin, dollop spoonfuls of the creamy cheesecake mix over it, and then add the remaining brownie batter on top. Take a knife or skewer and gently swirl the two mixtures together. Pop it in the oven for 28-35 minutes – mine are usually perfect at 30 minutes! When they’re done, let them cool completely in the tin, then chill them in the fridge for at least an hour (overnight is even better for perfect slices!).
My Top Tips for Success
- I always make sure my butter and cream cheese are at room temperature. It makes them so much easier to mix smoothly, preventing lumps.
- Don’t overmix the brownie batter once you add the flour. Overmixing develops gluten, which can lead to tough brownies instead of fudgy ones. Mix until just combined!
- Trust me on this one: don’t overbake. Brownies are prone to drying out, so take them out when a skewer inserted in the center still has a few moist crumbs attached.
- For clean slices, I always chill my brownies thoroughly in the fridge before cutting. A warm knife helps too!
- Use a good quality red food coloring for a vibrant, true red velvet color. Gel colors work best.
Common Mistakes to Avoid
- Overmixing the batter: This can lead to tough, cakey brownies. Mix until just combined.
- Overbaking: If you bake them too long, they’ll be dry and crumbly instead of fudgy. Keep an eye on them starting at 28 minutes.
- Not lining the tin: It might seem like an extra step, but parchment paper is essential for easy removal and clean-up.
- Cutting warm brownies: They will fall apart and be messy. Always chill them completely before slicing.
How to Store Red Velvet Brownie Recipe
- Countertop: Store in an airtight container for up to 2-3 days.
- Refrigerator: Store in an airtight container for up to 5-7 days. The cheesecake swirl makes them best when chilled.
- Freezer: Wrap individual brownies tightly in plastic wrap, then place in a freezer-safe bag or container for up to 2-3 months. Thaw at room temperature or in the fridge.
Frequently Asked Questions
Can I use liquid red food coloring?
Yes, you can, but you might need to use a bit more to achieve a vibrant color. Gel food coloring provides a more intense color with less liquid, which is my preference.
Why do my brownies taste cakey instead of fudgy?
This usually happens from overmixing the batter or overbaking. Mix until just combined and remove from the oven when a few moist crumbs remain on a toothpick.
Do I have to chill the brownies?
While you can eat them warm, chilling the brownies makes them much easier to cut into clean squares and enhances their fudgy texture. The cheesecake swirl also sets better when cold.
What if I don’t have white wine vinegar?
You can substitute with apple cider vinegar. The vinegar reacts with the cocoa to enhance the red color and provides the classic red velvet tang.
Can I make these in a different size pan?
You can, but baking times will vary. A larger pan will result in thinner brownies that bake faster, while a smaller pan will make thicker brownies that need more time.
I really hope this Red Velvet Brownie Recipe brings a little bit of joy and deliciousness to your kitchen. They’re such a classic for a reason, and that cheesecake swirl just takes them over the top! If you give them a try, please let me know how they turn out!
PrintRed Velvet Brownie Recipe
Rich, fudgy red velvet brownies swirled with a creamy, tangy cheesecake topping for an irresistible dessert.
- Prep Time: 20
- Cook Time: 30
- Total Time: 110
- Yield: 16 brownies
- Category: Dessert
- Method: Baking
- Cuisine: American
- Diet: Vegetarian
Ingredients
- 150 g unsalted butter
- 275 g caster sugar
- 2 tsp vanilla extract
- 1 tsp red food colouring
- 4 medium eggs
- 30 g cocoa powder
- 125 g plain flour
- 1 tsp white wine vinegar
- 250 g full-fat soft cream cheese
- 75 g caster sugar
- 1 tsp vanilla extract
- 1 egg yolk
Instructions
- Preheat your oven to 180ºC/160ºC fan.
- Line a 9×9" square tin with parchment paper.
- In a large bowl, beat together the butter and 275g caster sugar until combined.
- Add in 2 tsp vanilla extract and red food colouring.
- Mix again until fully incorporated.
- Add in the 4 medium eggs, one at a time, mixing well after each addition.
- Add in the cocoa powder and plain flour.
- Mix until just combined.
- Finally, add in the white wine vinegar.
- Stir through the brownie mixture.
- In a separate bowl, add the full-fat soft cream cheese.
- Mix to loosen the cream cheese slightly.
- Add 75g caster sugar and 1 tsp vanilla extract to the cream cheese.
- Mix together until smooth.
- Add the egg yolk to the cream cheese mixture.
- Mix through until fully combined.
- Pour 90% of the brownie mixture into the prepared lined tin.
- Dollop spoonfuls of the cream cheese mix over the brownie layer.
- Dollop the last little bit of brownie mix over the cream cheese.
- Swirl the mixtures together gently with a knife or skewer for a marbled effect.
- Bake in the oven for 28-35 minutes, or until a toothpick inserted comes out with moist crumbs.
- Leave the brownies to cool completely in the tin.
- Set the cooled brownies in the fridge for at least an hour, or preferably overnight, before slicing.
Notes
Ensure all cold ingredients like butter and cream cheese are at room temperature for smooth mixing.
Do not overmix the brownie batter once flour is added to keep them fudgy.
For clean slices, chill the brownies thoroughly before cutting.
Use a gel food coloring for a more intense red color.