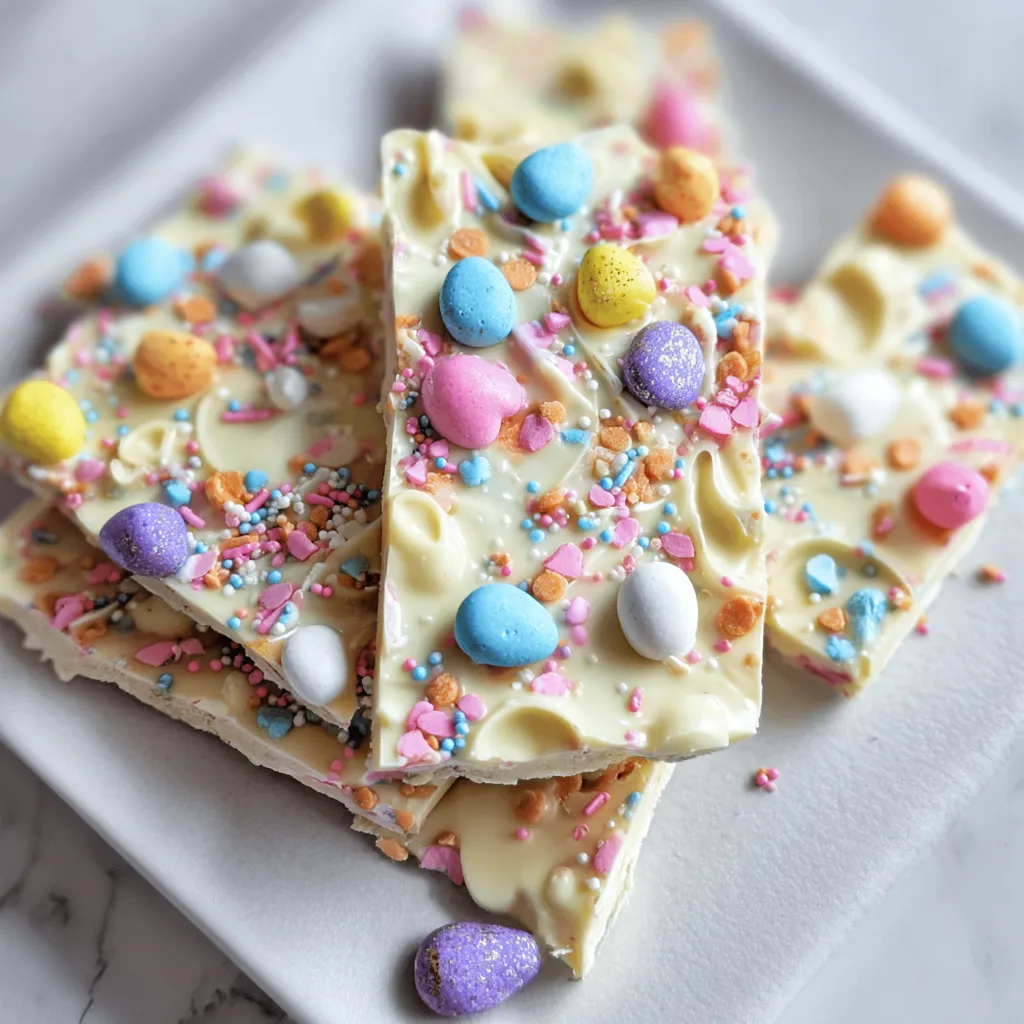
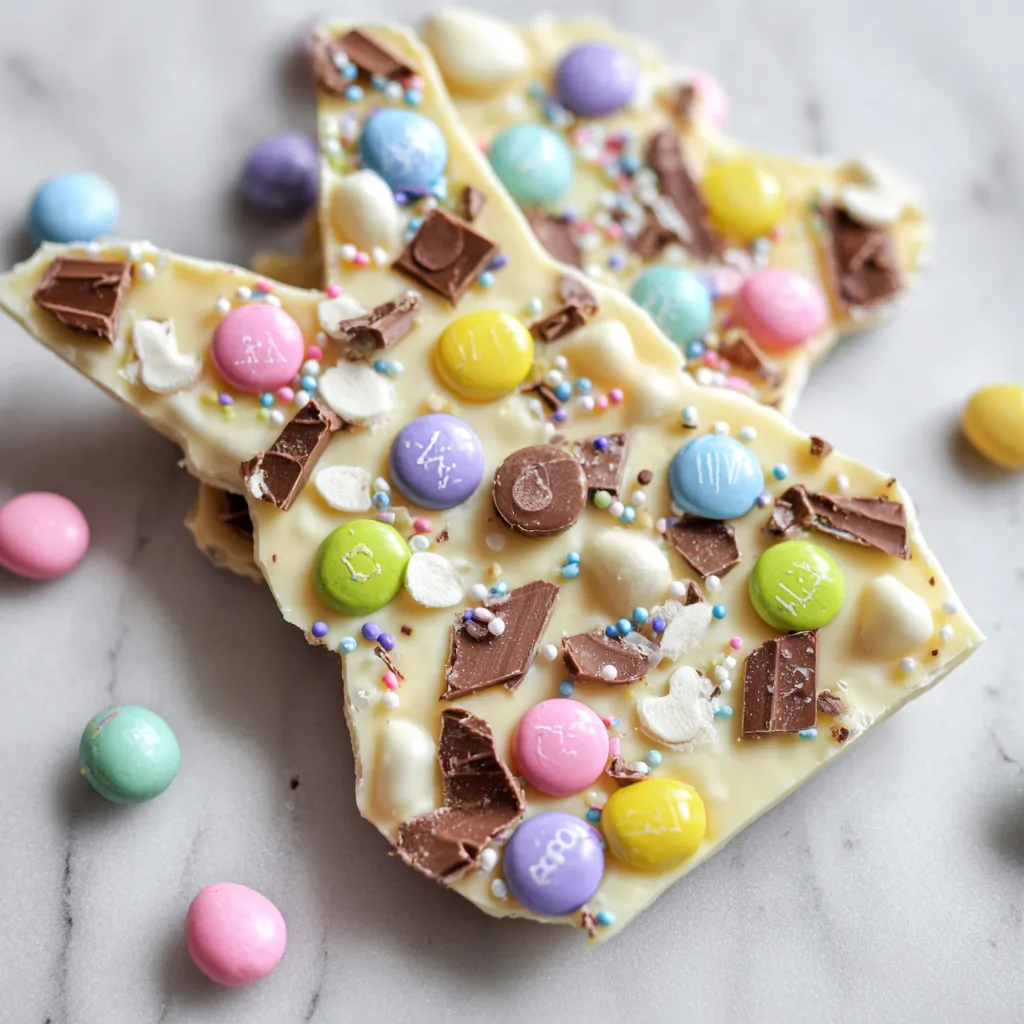
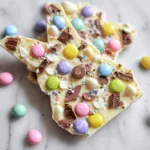
Get ready to hop into spring with the most delightful and charming Easter Bunny Bark! This isn’t just any ordinary chocolate bark; it’s a vibrant, whimsical, and utterly irresistible confection that captures the joy and sweetness of the Easter season in every bite. Imagine a canvas of smooth, creamy white chocolate, swirled with pastel hues, and generously adorned with an assortment of festive candies, crunchy cookies, and adorable bunny-themed sprinkles. It’s a treat that’s as fun to make as it is to devour, offering a delightful interplay of textures from melt-in-your-mouth chocolate to satisfying crunch, all bursting with sweet, celebratory flavors.
Why We Love This Easter Bunny Bark
This Easter Bunny Bark is a true showstopper, a unique creation that stands head and shoulders above typical holiday sweets. What makes it truly special is its incredible versatility and visual appeal. Unlike a simple cookie or cake, each piece of bark is a miniature work of art, allowing for endless customization with your favorite spring-themed goodies. The base of luxurious white chocolate provides a sweet, creamy foundation that perfectly complements the myriad of additions, making every bite a delightful surprise.
The flavor profile is pure joy – a harmonious blend of rich, sweet white chocolate with bursts of fruity, tart, and crunchy notes from the toppings. There’s the sugary chew of jelly beans, the delicate crispness of cookies, and the soft melt of pastel candies, all contributing to a multi-dimensional taste experience. The texture is equally captivating: a satisfying snap as you break off a piece, followed by the smooth, velvety chocolate melting on your tongue, punctuated by playful crunches and chewy bits. It’s better than other versions because it encourages creativity and celebrates the vibrant palette of Easter, allowing you to infuse your personality into each batch.
We absolutely adore the personal touch this bark allows. You can literally sprinkle your creativity all over it! Whether you’re making it with kids, for a festive gathering, or as a thoughtful homemade gift, it always feels special. The simple technique of melting, spreading, and decorating makes it approachable for all skill levels, yet the results are always impressive. It’s perfect for Easter brunches, spring parties, or simply as a delightful treat to enjoy during the holiday weekend. Its festive appearance and incredible taste make it an instant favorite.
Beyond its deliciousness, this bark embodies the spirit of Easter. It’s bright, cheerful, and brings a smile to everyone’s face. It’s a wonderful activity to share with family, creating lasting memories as you arrange the colorful toppings. Each piece is a little celebration, a sweet reminder of springtime and new beginnings. It’s not just a confection; it’s an experience, a moment of joy wrapped up in chocolatey goodness. Truly, a masterpiece of spring treats!
An Irresistible Springtime Symphony of Sweetness!
Prepare your senses for an absolute indulgence that transcends the ordinary; this Easter Bunny Bark is an over-the-top, celebratory explosion of flavor and texture that will leave everyone clamoring for more. From the moment it’s presented, its vibrant colors and playful toppings create an instant visual feast, drawing you in with promises of sugary bliss. The soft, sweet aroma of melting white chocolate, mingled with hints of vanilla and candy, perfumes the air, signaling that something truly magical is about to be enjoyed. Each delicate crack as you break off a piece is a tiny preamble to the symphony of sensations that awaits your palate.
The texture journey is nothing short of extraordinary. The base white chocolate is impossibly smooth and creamy, melting luxuriously on the tongue like a soft whisper. This velvety foundation is then magnificently contrasted by the satisfying crunch of mini bunny cookies, the chewy resistance of fruity jelly beans, and the delicate crispness of pastel candies. You’ll encounter pockets of delightful squishiness, surprising bursts of sweetness, and playful pops of sugar, all designed to keep your taste buds utterly captivated. It’s a tactile adventure, a playful dance between soft, yielding chocolate and crunchy, vibrant embellishments that ensures every single bite is unique and exciting.
People simply cannot resist this bark because it embodies pure, unadulterated joy. It’s not just a dessert; it’s a celebration encapsulated in chocolate. The cheerful design and array of textures make it incredibly engaging, drawing smiles and gasps of delight. It’s the perfect treat for brightening up an Easter brunch table, adding a festive touch to a dessert buffet, or packaging up as charming gifts that exude homemade love. Imagine serving this at a spring garden party, watching guests’ eyes light up as they discover each new topping combination—it’s truly a conversation starter and a memory maker.
What makes this bark truly memorable is its ability to blend sophisticated indulgence with playful charm. It’s a sophisticated treat that doesn’t take itself too seriously, inviting everyone to embrace the childlike wonder of Easter. The combination of high-quality chocolate with thoughtfully chosen, visually appealing candies elevates it beyond a simple snack into a truly special occasion confection. It’s the kind of dessert that leaves a lasting impression, not just for its delectable taste, but for the sheer delight and festive spirit it brings to any spring gathering. An unforgettable experience, bite after delightful bite!
Use High Quality Ingredients for Easter Bunny Bark
When it comes to crafting something as visually stunning and deliciously indulgent as Easter Bunny Bark, the quality of your ingredients isn’t just a suggestion—it’s paramount. Using premium ingredients elevates this simple confection from good to absolutely extraordinary. High-quality chocolates melt smoother, taste richer, and provide a superior base that truly allows the vibrant toppings to shine. Think of it as building a masterpiece; you wouldn’t use cheap paint on a valuable canvas, and similarly, you shouldn’t compromise on the foundational elements of your beautiful bark.
What do premium ingredients bring to the table? For starters, a much more nuanced and complex flavor profile. A high-quality white chocolate, for instance, isn’t just sweet; it’s creamy, with subtle notes of vanilla and sometimes even a delicate cocoa butter richness that budget brands simply can’t replicate. This luxurious base ensures that each bite is melt-in-your-mouth decadent, rather than overly sugary or waxy. Furthermore, better quality candies often boast more authentic flavors and appealing textures, contributing to a more satisfying and enjoyable eating experience. The vibrancy of their colors also tends to be more natural and less artificial, which enhances the overall festive aesthetic.
Specific ingredient callouts are crucial here. Opt for a high-grade white chocolate; look for brands that list cocoa butter as a primary ingredient, not just sugar and vegetable oil. Callebaut, Ghirardelli, or Valrhona white chocolate melting wafers are excellent choices that will give you that coveted smooth, glossy finish and superior taste. For your pastel candies and sprinkles, choose brands that offer bright, true colors and fresh, appealing textures. Even the mini bunny cookies should be carefully selected for their crispness and mild flavor, ensuring they complement rather than overpower the delicate chocolate. Investing a little more in your ingredients ensures your Easter Bunny Bark is not just pretty, but truly unforgettable.
Ingredients You Need
Easter Bunny Bark Recipe
- White chocolate chips or melting wafers
- Pink food coloring
- Purple food coloring
- Blue food coloring
- Yellow food coloring
- Green food coloring
- Miniature chocolate eggs
- Pastel candy-coated chocolates
- Jelly beans
- Spring-themed sprinkles
- Miniature bunny cookies
- Crushed vanilla wafers
- Edible glitter (optional)
- A touch of coconut oil (optional, for melting)
Royal Icing Accents
- Powdered sugar
- Meringue powder
- Warm water
- Vanilla extract
- Gel food coloring (black or brown)
Instructions
How to Make The Best Easter Bunny Bark with Royal Icing Accents!
Begin by preparing your workspace. Line a large baking sheet (about 10×15 inches or larger) with parchment paper or a silicone baking mat. This step is crucial for easy removal of the bark once it’s set. Next, divide your white chocolate chips or melting wafers into six separate heatproof bowls. You’ll need one larger bowl for the main white chocolate base, and five smaller bowls for the colored drizzles. For melting, you can use a microwave or a double boiler. If using a microwave, heat the chocolate in 30-second intervals, stirring well after each, until smooth and fully melted. Be careful not to overheat, as white chocolate can seize easily. If using a double boiler, place the bowls over simmering water, ensuring the bottom of the bowl doesn’t touch the water, and stir until melted and smooth. Once melted, if your chocolate seems a bit too thick, stir in about 1/2 teaspoon of coconut oil per bowl to thin it slightly for easier spreading and drizzling, though this is optional and depends on your chocolate brand.
Take one of your smaller bowls of melted white chocolate and stir in a tiny drop of pink gel food coloring until a vibrant, uniform pastel pink is achieved. Repeat this process for purple, blue, yellow, and green in the other four smaller bowls. Remember, a little gel food coloring goes a long way, so add sparingly. Allow these colored chocolates to cool slightly, but remain fluid enough to drizzle. Now, pour the majority of your plain melted white chocolate (from the largest bowl) onto the prepared baking sheet. Using an offset spatula or the back of a spoon, gently spread it into an even layer, aiming for about 1/4 to 1/2 inch thick across the entire sheet. It doesn’t have to be perfectly rectangular; a rustic, free-form shape adds to its charm. Work relatively quickly while the chocolate is still warm.
Immediately, before the white chocolate base sets, take your bowls of colored chocolates. Drizzle generous lines or swirls of each pastel color randomly over the plain white chocolate base. You can use a spoon for this, or transfer the colored chocolates into small piping bags or Ziploc bags with the corner snipped off for more precision. Once all the colors are drizzled, take a skewer, toothpick, or the thin end of a knife and gently swirl through the colored chocolates, creating beautiful marbled patterns. Avoid over-swirling, as this can mix the colors too much. As soon as you’re done swirling, begin to adorn your bark with the festive toppings. Scatter the miniature chocolate eggs, pastel candy-coated chocolates, jelly beans, spring sprinkles, and miniature bunny cookies all over the still-wet chocolate base. Press some of the larger items gently into the chocolate to ensure they adhere well. Finally, if desired, lightly sprinkle edible glitter over the entire bark for an extra magical sparkle. Allow the bark to set completely at room temperature for at least 2-4 hours, or in the refrigerator for about 30-60 minutes, until firm and snappy. Avoid common mistakes like over-swirling the colors or letting the base chocolate set before adding toppings.
How to Make the Royal Icing Accents
To create the perfect royal icing for delicate accents, start by sifting 2 cups of powdered sugar into a medium-sized bowl to remove any lumps. Add 2 tablespoons of meringue powder to the sifted sugar and whisk them together thoroughly. Gradually add about 3-4 tablespoons of warm water, one tablespoon at a time, mixing with an electric mixer on low speed or a sturdy whisk until a smooth, thick consistency is achieved. You’re aiming for icing that holds a soft peak but is still pipeable. Stir in 1/2 teaspoon of vanilla extract for flavor. If the icing is too thick, add a few drops more water; if it’s too thin, sift in a little more powdered sugar. Divide a small amount of the white icing into an even smaller bowl and tint it with a tiny drop of black or brown gel food coloring to create features like bunny eyes and noses. Transfer the white icing into a piping bag fitted with a very small round tip (like a Wilton #2 or #3), and the colored icing into an even smaller piping bag with an even finer tip.
Decorate the Bunny Cookies
Once your Easter Bunny Bark has fully set and hardened, it’s time for the final magical touch: decorating the miniature bunny cookies! Carefully break the bark into irregular pieces by hand or by gently tapping it with the back of a knife. Arrange these pieces artfully on a serving platter. Now, take your royal icing. Using the white royal icing, pipe tiny tails on the backsides of some of your mini bunny cookies, sticking them onto the bark. With the black or brown royal icing, carefully pipe two small dots for eyes and a tiny ‘V’ or ‘X’ for a nose onto the bunny cookies that are already embedded in the bark or added as standalone elements. This simple embellishment instantly transforms the cookies and brings those charming bunnies to life, adding personality and an extra layer of adorable detail to your festive bark. This visual appeal makes it truly irresistible!
More Festive Decorating Ideas!
Beyond our suggested toppings, the possibilities for decorating your Easter Bunny Bark are virtually endless! For an even more whimsical touch, consider adding pastel mini marshmallows, which turn delightfully soft when pressed into the chocolate. You could also include crushed pastel-colored cereal like Fruity Pebbles for a fun crunch and vibrant pop of color. To introduce a savory element that beautifully contrasts the sweetness, sprinkle on some finely chopped pretz-el pieces. For a garden-themed bark, use green coconut flakes (tinted with food coloring) to mimic grass, and place tiny edible sugar flowers amongst your bunnies. You can also alternate your chocolate base – try making half white chocolate and half milk chocolate, swirling them together for a marbled effect. Think about specific color schemes: a “robin’s egg blue” themed bark with blue speckled eggs and white sprinkles for a more sophisticated look. For a personalized touch, add candy alphabet letters to spell out “Happy Easter” on a larger piece of bark. And don’t forget the power of edible luster dust for an ethereal shimmer over the entire creation!
Storing Easter Bunny Bark
To keep your beautiful Easter Bunny Bark fresh and delicious, proper storage is key. If you plan to consume it within a few days, you can store it at room temperature in an airtight container away from direct sunlight and heat. This will help maintain its snappy texture and prevent the chocolate from melting or softening. For longer storage, or if your home is particularly warm, refrigerating the bark is recommended. Place the bark pieces in an airtight container, separating layers with parchment paper to prevent sticking. Stored this way, it will remain fresh for up to two weeks in the refrigerator. When ready to serve from the fridge, allow it to sit at room temperature for about 10-15 minutes to take the chill off, which enhances the flavor and texture of the chocolate. Freezing is also an option for extended preservation; wrap individual pieces tightly in plastic wrap, then place them in a freezer-safe bag or container for up to two months. Thaw frozen bark in the refrigerator overnight, then bring to room temperature before serving. Avoid drastic temperature changes, as this can cause the chocolate to bloom (a white, powdery film that affects appearance but not safety).
PrintEaster Bunny Bark
Easter Bunny Bark: Make this easy, festive treat! Perfect for spring, impress everyone. Try it today!
- Prep Time: 30 minutes
- Cook Time: 5 minutes
- Total Time: 250 minutes
- Yield: 12 servings
- Category: Dessert
- Cuisine: American
Ingredients
- 500 grams white chocolate chips or melting wafers
- 1 drop pink food coloring (gel)
- 1 drop purple food coloring (gel)
- 1 drop blue food coloring (gel)
- 1 drop yellow food coloring (gel)
- 1 drop green food coloring (gel)
- 1/2 cup miniature chocolate eggs
- 1/2 cup pastel candy-coated chocolates
- 1/4 cup jelly beans
- 2 tablespoons spring-themed sprinkles
- 1/4 cup miniature bunny cookies
- 1/4 cup crushed vanilla wafers
- 1/2 teaspoon edible glitter (optional)
- 1 teaspoon coconut oil (optional, for melting)
- 2 cups powdered sugar
- 2 tablespoons meringue powder
- 3–4 tablespoons warm water
- 1/2 teaspoon vanilla extract
- 1 drop black gel food coloring (optional)
- 1 drop brown gel food coloring (optional)
Instructions
- Begin by preparing your workspace. Line a large baking sheet (about 10×15 inches or larger) with parchment paper or a silicone baking mat. This step is crucial for easy removal of the bark once it’s set. Next, divide your white chocolate chips or melting wafers into six separate heatproof bowls. You’ll need one larger bowl for the main white chocolate base, and five smaller bowls for the colored drizzles. For melting, you can use a microwave or a double boiler. If using a microwave, heat the chocolate in 30-second intervals, stirring well after each, until smooth and fully melted. Be careful not to overheat, as white chocolate can seize easily. If using a double boiler, place the bowls over simmering water, ensuring the bottom of the bowl doesn’t touch the water, and stir until melted and smooth. Once melted, if your chocolate seems a bit too thick, stir in about 1/2 teaspoon of coconut oil per bowl to thin it slightly for easier spreading and drizzling, though this is optional and depends on your chocolate brand.
- Take one of your smaller bowls of melted white chocolate and stir in a tiny drop of pink gel food coloring until a vibrant, uniform pastel pink is achieved. Repeat this process for purple, blue, yellow, and green in the other four smaller bowls. Remember, a little gel food coloring goes a long way, so add sparingly. Allow these colored chocolates to cool slightly, but remain fluid enough to drizzle. Now, pour the majority of your plain melted white chocolate (from the largest bowl) onto the prepared baking sheet. Using an offset spatula or the back of a spoon, gently spread it into an even layer, aiming for about 1/4 to 1/2 inch thick across the entire sheet. It doesn’t have to be perfectly rectangular; a rustic, free-form shape adds to its charm. Work relatively quickly while the chocolate is still warm.
- Immediately, before the white chocolate base sets, take your bowls of colored chocolates. Drizzle generous lines or swirls of each pastel color randomly over the plain white chocolate base. You can use a spoon for this, or transfer the colored chocolates into small piping bags or Ziploc bags with the corner snipped off for more precision. Once all the colors are drizzled, take a skewer, toothpick, or the thin end of a knife and gently swirl through the colored chocolates, creating beautiful marbled patterns. Avoid over-swirling, as this can mix the colors too much. As soon as you’re done swirling, begin to adorn your bark with the festive toppings. Scatter the miniature chocolate eggs, pastel candy-coated chocolates, jelly beans, spring sprinkles, and miniature bunny cookies all over the still-wet chocolate base. Press some of the larger items gently into the chocolate to ensure they adhere well. Finally, if desired, lightly sprinkle edible glitter over the entire bark for an extra magical sparkle. Allow the bark to set completely at room temperature for at least 2-4 hours, or in the refrigerator for about 30-60 minutes, until firm and snappy. Avoid common mistakes like over-swirling the colors or letting the base chocolate set before adding toppings.
- To create the perfect royal icing for delicate accents, start by sifting 2 cups of powdered sugar into a medium-sized bowl to remove any lumps. Add 2 tablespoons of meringue powder to the sifted sugar and whisk them together thoroughly. Gradually add about 3-4 tablespoons of warm water, one tablespoon at a time, mixing with an electric mixer on low speed or a sturdy whisk until a smooth, thick consistency is achieved. You’re aiming for icing that holds a soft peak but is still pipeable. Stir in 1/2 teaspoon of vanilla extract for flavor. If the icing is too thick, add a few drops more water; if it’s too thin, sift in a little more powdered sugar. Divide a small amount of the white icing into an even smaller bowl and tint it with a tiny drop of black or brown gel food coloring to create features like bunny eyes and noses. Transfer the white icing into a piping bag fitted with a very small round tip (like a Wilton #2 or #3), and the colored icing into an even smaller piping bag with an even finer tip.
- Once your Easter Bunny Bark has fully set and hardened, it’s time for the final magical touch: decorating the miniature bunny cookies! Carefully break the bark into irregular pieces by hand or by gently tapping it with the back of a knife. Arrange these pieces artfully on a serving platter. Now, take your royal icing. Using the white royal icing, pipe tiny tails on the backsides of some of your mini bunny cookies, sticking them onto the bark. With the black or brown royal icing, carefully pipe two small dots for eyes and a tiny ‘V’ or ‘X’ for a nose onto the bunny cookies that are already embedded in the bark or added as standalone elements. This simple embellishment instantly transforms the cookies and brings those charming bunnies to life, adding personality and an extra layer of adorable detail to your festive bark. This visual appeal makes it truly irresistible!
Notes
Get ready to hop into spring with the most delightful and charming Easter Bunny Bark! This isn’t just any ordinary chocolate bark; it’s a vibrant, whimsical, and utterly irresistible confection that captures the joy and sweetness of the Easter season in every bite. Imagine a canvas of smooth, creamy white chocolate, swirled with pastel hues, and generously adorned with an assortment of festive candies, crunchy cookies, and adorable bunny-themed sprinkles. It’s a treat that’s as fun to make as it is to devour, offering a delightful interplay of textures from melt-in-your-mouth chocolate to satisfying crunch, all bursting with sweet, celebratory flavors.