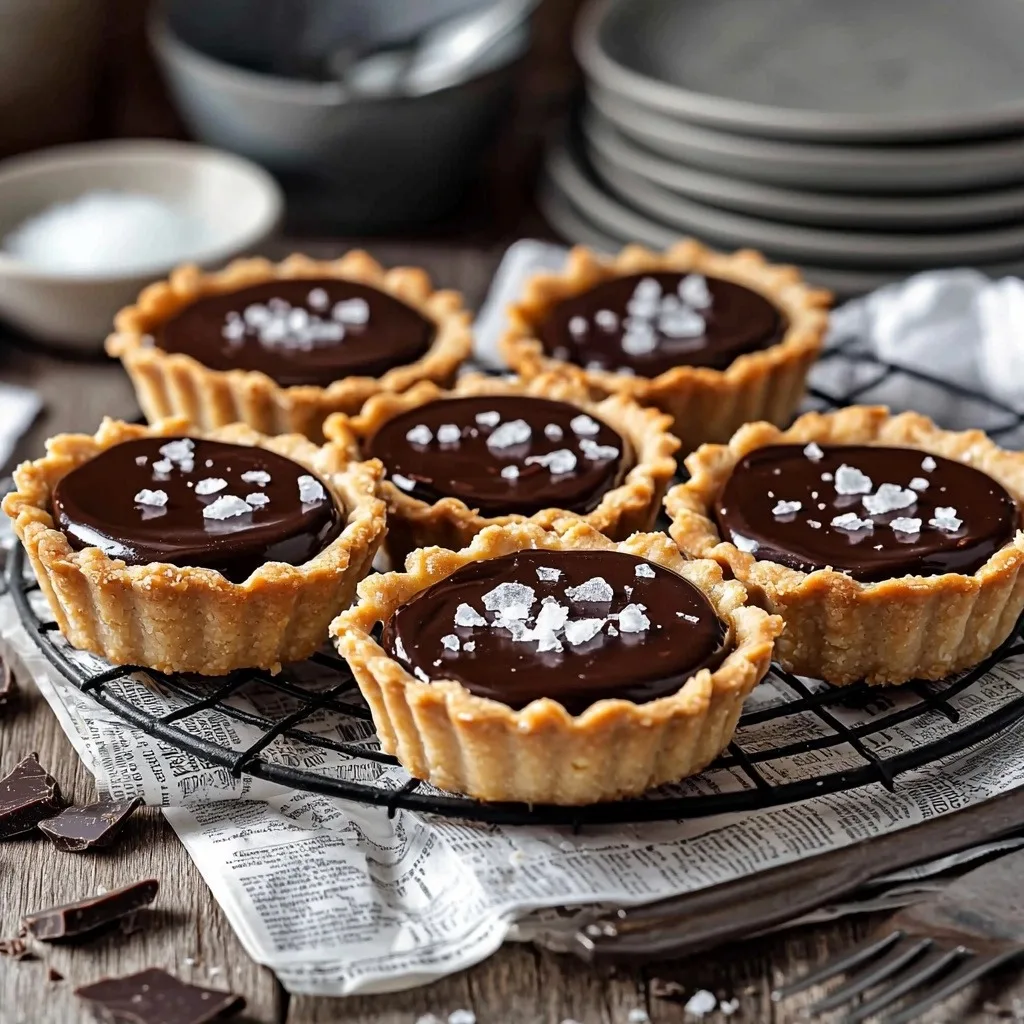
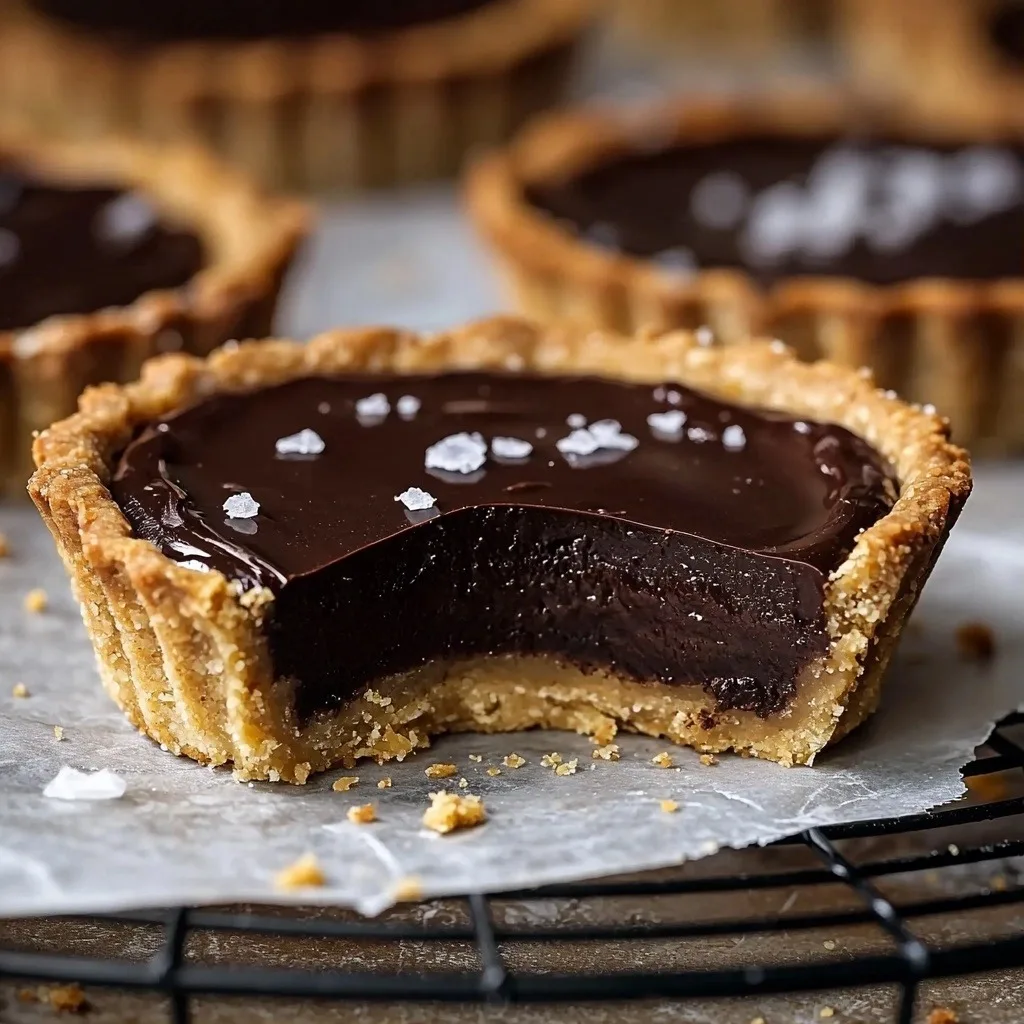
There’s something so comforting about a small, perfectly portioned treat. For me, these Mini Chocolate Tarts are that treat. I remember the first time I made them for a casual get-together; everyone’s eyes lit up when they saw these elegant little beauties. They’re surprisingly simple to make, but they look like you spent hours in the kitchen, and that rich chocolate filling in a crisp shell? Pure bliss!
Why You’ll Love This Mini Chocolate Tarts
- They’re perfectly portioned, so no need to cut slices – just grab and enjoy!
- That rich, velvety chocolate ganache filling is absolutely divine and melts in your mouth.
- The buttery, crisp tart shell provides the perfect contrast to the smooth filling.
- They’re surprisingly easy to make and impressive enough for any special occasion or a cozy night in.
Ingredients You’ll Need
- Unsalted butter: Using unsalted butter gives you control over the salt content. Make sure it’s softened for easy mixing into the dough.
- Granulated sugar: Adds just the right amount of sweetness to the tart shells.
- Large egg yolk: This helps bind the dough and adds richness. Make sure it’s at room temperature so it incorporates smoothly.
- Vanilla extract: A little vanilla enhances all the other flavors in the tart shell.
- All-purpose flour: The backbone of our tart shells! Make sure to measure it correctly, spooning and leveling is best.
- Semisweet chocolate: Choose a good quality chocolate here, as it’s the star of the filling. Chopping it finely helps it melt evenly.
- Heavy cream: This creates that luscious, smooth ganache. Don’t substitute with lighter creams.
- Sea salt flakes: A sprinkle of flaky sea salt on top is optional, but it really elevates the chocolate flavor and adds a lovely contrast.
How to Make Mini Chocolate Tarts Step by Step
First, let’s get those lovely tart shells ready. You’ll start by creaming together softened butter and sugar until it’s light and fluffy – a spatula works perfectly here. Then, you’ll mix in the egg yolk and vanilla extract. This is where the liquid ingredients come in, helping to bring everything together.
Next, gently fold in your all-purpose flour until it just forms a dough. Don’t overmix! Wrap it up, flatten it a bit, and pop it into the fridge for 30 minutes. This chilling step is super important to prevent the shells from shrinking. While that’s chilling, you can preheat your oven to 340ºF (170ºC) – make sure to use upper and lower heat.
Once your dough is firm, you’ll take small pieces, roll them into balls, and press them evenly into your 2.5-inch tart molds. Don’t worry if it’s not perfect; you can trim the excess dough with a knife. Prick the bottoms with a fork, then give them a quick 10-minute chill in the freezer before baking for 20-25 minutes until golden brown. Let them cool completely before carefully removing them from the molds.
Now for the magical chocolate ganache! Place your chopped chocolate into a container that’s easy to pour from later. Heat heavy cream until you see bubbles forming around the edges, then pour it over the chocolate, making sure all the chocolate is submerged. Let it sit for 3 minutes – this allows the heat from the cream to melt the chocolate. Then, whisk it all together until it’s perfectly smooth and glossy. Pour this gorgeous ganache into your cooled tart shells, give them a little wiggle to smooth the tops, and chill for 30 minutes. A sprinkle of sea salt and they’re ready to enjoy!
My Top Tips for Success
- I always measure my flour using the spoon and level method, or even better, a kitchen scale. This prevents dry, crumbly dough.
- For perfect tart shells, don’t skip the chilling steps! It helps prevent shrinking and keeps their shape.
- Trust me on this one: use good quality chocolate for the ganache. It makes a huge difference in flavor.
- Don’t overmix the tart dough once the flour is added. Mix just until it comes together.
- Make sure the tart shells are completely cool before adding the warm ganache, or things could get messy!
Common Mistakes to Avoid
- Overworking the dough: This develops the gluten too much, leading to tough tart shells. Mix only until just combined.
- Not chilling the dough: Skipping this step can lead to tart shells that shrink excessively during baking. Always chill the dough.
- Overbaking the shells: This can make them dry and crumbly. Bake until just golden brown.
- Not letting the ganache sit: If you stir the chocolate and cream immediately, it might not emulsify properly. Let it sit for 3 minutes first.
- Using low-quality chocolate: The ganache is the star, so cheap chocolate will result in a less flavorful filling. Invest in good chocolate!
How to Store Mini Chocolate Tarts
- Room Temperature: Not recommended for extended periods due to the cream in the ganache.
- Refrigerator: Up to 2-3 days in an airtight container. Allow them to come to room temperature for about 15-20 minutes before serving for best flavor and texture.
- Freezer: Not recommended for assembled tarts, as the ganache texture can change upon thawing. You can freeze baked tart shells for up to 1 month, then fill them fresh.
Frequently Asked Questions
Can I make these tarts ahead of time?
Yes, you can! The tart shells can be baked a day in advance and stored at room temperature. The ganache can also be made a day ahead, chilled, and then gently reheated and whisked before filling the shells.
What kind of chocolate is best for the ganache?
I recommend using a good quality semisweet chocolate with around 50-60% cocoa solids. Chocolate chips work, but a chopped bar of baking chocolate will give you a smoother, richer ganache.
My tart shells are sticking to the molds, what did I do wrong?
This usually happens if your molds are older, scratched, or not quite non-stick anymore. If you have this issue, lightly grease your molds with butter or a non-stick spray before pressing in the dough.
Can I use different flavored chocolate?
Absolutely! Dark chocolate or even milk chocolate could work, though you might need to adjust the cream ratio slightly for milk chocolate as it’s sweeter and has a different fat content. Semisweet is a great starting point.
Why do I need to prick the base of the tart shells?
Pricking the base with a fork, also known as “docking,” helps prevent the crust from puffing up unevenly during baking. It allows steam to escape, keeping your tart shells flat and perfectly shaped.
I hope these Mini Chocolate Tarts bring a little bit of joy and deliciousness to your day. They’re truly a gem of a recipe, and I can’t wait for you to try them. If you whip up a batch of these Mini Chocolate Tarts, please let me know how they turn out!
PrintMini Chocolate Tarts
These elegant mini chocolate tarts feature a buttery, crisp shell filled with a rich, velvety chocolate ganache, perfect for any occasion.
- Prep Time: 45
- Cook Time: 25
- Total Time: 70
- Yield: 9 tarts
- Category: Dessert
- Method: Baking, No-Bake (filling)
- Cuisine: American
- Diet: Vegetarian
Ingredients
- ⅓ cup (75 g) unsalted butter
- 2 tablespoon granulated sugar
- 1 large egg yolk
- 1 teaspoon vanilla extract
- 1 cup (130 g) all-purpose flour
- 4 oz (110 g) semisweet chocolate
- ½ cup (125 ml) heavy cream
- some sea salt flakes
Instructions
- Soften the unsalted butter.
- Add softened butter and granulated sugar into a bowl.
- Mix well using a spatula until combined.
- Add the room temperature egg yolk to the butter mixture.
- Add vanilla extract to the mixture.
- Continue mixing until well incorporated.
- Add all-purpose flour to the wet ingredients.
- Bring everything together into a cohesive dough using your hands or a spatula.
- Place the dough on a piece of cling film.
- Wrap the dough in cling film.
- Flatten the dough to a thickness of approximately 1 inch.
- Chill the dough in the fridge for 30 minutes to firm up.
- Preheat the oven to 340ºF (170ºC) using upper and lower heat.
- Once the dough is firmed, take a piece of dough.
- Form the dough piece into a small ball.
- Press the dough ball evenly into a 2.5-inch (6.5 cm) tart mold.
- Cut the excess dough from the edges of the mold with a knife.
- Prick the base of the tart shell with a fork.
- Repeat this process until you have 9 tart shells in total.
- Place the filled tart molds in the freezer for 10 minutes.
- Place the frozen tart shells on a baking tray.
- Bake the tart shells in the preheated oven on the lowest rack.
- Bake for 20-25 minutes, or until they are golden brown.
- Remove the tart shells from the oven.
- Leave the tart shells to cool completely.
- Once cooled, flip the molds and tap the bottom to release the shells.
- Alternatively, gently squeeze the molds on opposite sides to help release the shells.
- Set the baked tart shells aside.
- Chop the semisweet chocolate into small pieces.
- Add the chopped chocolate into a peaked container (this makes filling easier).
- Add heavy cream into a pot.
- Heat the heavy cream until bubbles are forming on the edges.
- Pour the hot heavy cream over the chopped chocolate in the container.
- Ensure all the chocolate is submerged in the cream.
- Leave the mixture undisturbed for 3 minutes.
- Using a hand whisk, mix everything until you get a homogenous chocolate ganache.
- Pour and divide the chocolate ganache evenly into the cooled tart shells.
- Wiggle the tart shells a bit to smoothen the tops of the ganache.
- Place the filled tarts on a tray.
- Chill the tarts in the fridge for 30 minutes before serving.
- Sprinkle with some coarse sea salt just before serving.
- Enjoy your delicious mini chocolate tarts!
Notes
Always measure flour using the spoon and level method or a kitchen scale for best results.
Chilling the dough is crucial to prevent tart shells from shrinking during baking.
Use good quality chocolate for the ganache; it significantly impacts the flavor.
Do not overmix the tart dough once flour is added to keep it tender.
Baked tart shells can be stored in an airtight container for up to 1 day if making ahead.